Creating Objects Using Header Files in Arduino
Tutorial
Writing Your Own (Basic) Library for Your Robot
by Chloe Kuo
Overview
While it’s entirely possible to write all of your robot’s code in a single Arduino sketch, doing so will likely make debugging difficult. After all, your robot will have line sensing code, turning logic, wall sensing code, FFT code, perhaps a DFS algorithm, a maze data structure, and far more!
Instead of writing all of these tasks into one sketch, it’s far easier to break them down into different objects, and write classes for each object. This way, if something is wrong with say, the maze algorithm that you coded up for example, the error will be easier to fix because all of your maze code will be contained in a single class.
This tutorial details how to neaten up and better organize your code by creating classes in Arduino by using header files. It assumes that you have basic experience with an object oriented programming language, like Java or C++.
OOP Class Design
Let’s say one of our robot’s capabilities is keeping a maze data structure that has the capability to remember which locations on the maze are visited/unvisited, can search for unvisited locations, and can mark an unvisited location as visited, for example:
[1 0 0 0 0 0
 1 0 0 0 0 0    // integer values of 1 represent visited locations
 1 0 0 0 0 0    // integer values of 0 represent unvisited locations
 1 0 1 1 1 1
 1 0 1 0 0 0
 1 1 1 0 0 0];
This is a great example of a class that we can create, then use in our main Arduino sketch. Creating a Maze object can combine all of these desired capabilities into a single entity, and will eliminate us having long or complex maze solving algorithms in our main sketch. Plus, once we write the object’s class and get it right, we no longer have to think about what is inside the class!
Creating a Header Files
We’ll be creating the Maze object’s class in a header file. Open up the Arduino sketch that your robot is running, or a new Arduino sketch. Type cmd+shift+n (Mac) or ctrl+shift+n (Windows) and enter the name of your object with “.h” at the end:
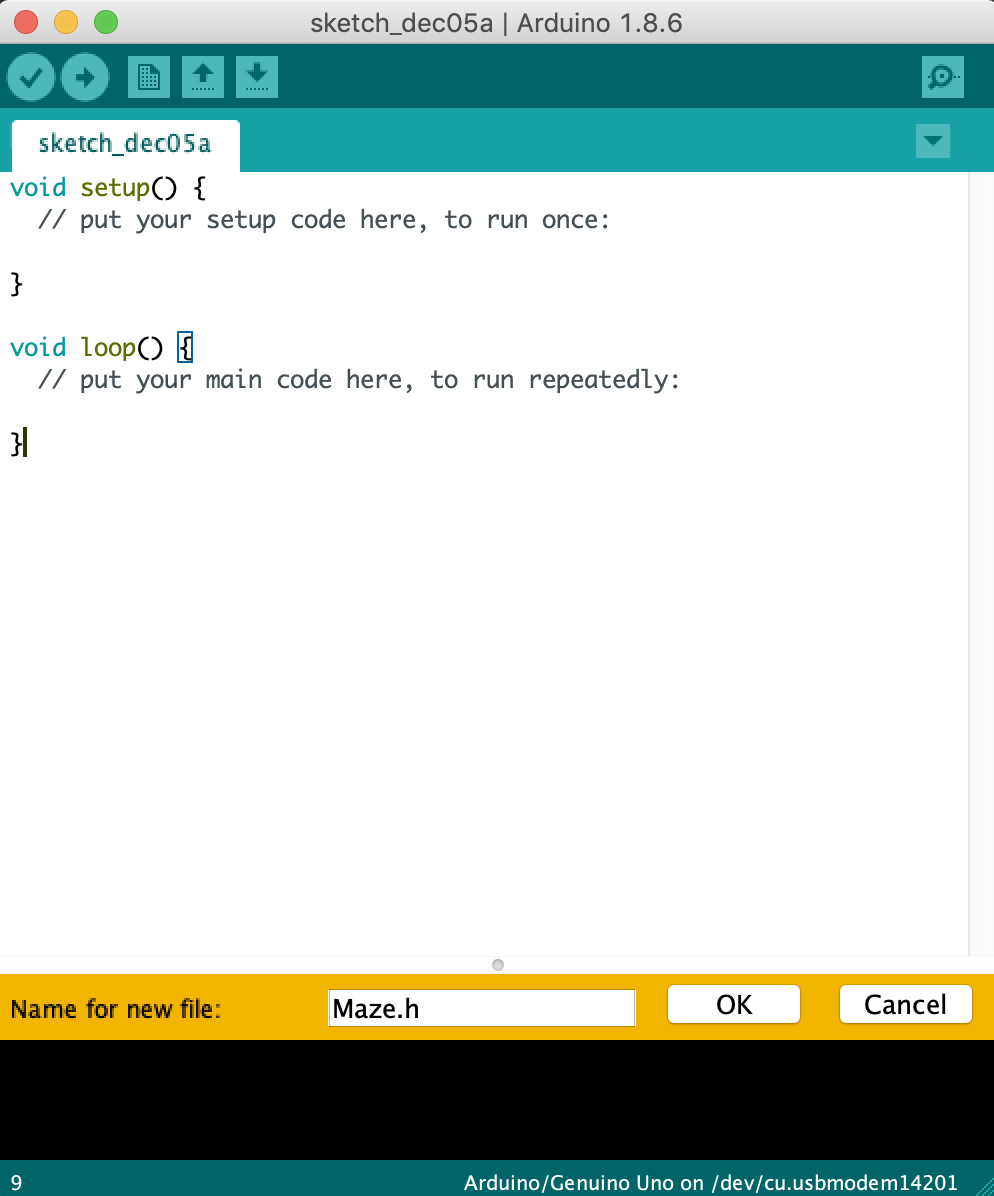
This creates a Maze.h file in the same directory as your sketch.
Writing a Class
Coding in header files follows C++ syntax. Familiarity with it will help out a lot, but this tutorial walks through the baseline syntax you’ll need.
We begin writing Maze.h. To create the Maze object, we use the following syntax:
/* Maze.h
 *
 * Maze Object that uses an integer 2D array
 * to keep track of robot's visited and
 * unvisited locations on the real maze.
 */
class Maze {};
We then create our global variables to be used throughout the class. We haven chosen to use an int[][] as our data structure (common in Arduino), and define the size to be 9 rows and 9 columns:
class Maze {

  /*=================
   * Global Variables
   ==================*/
  int maze[9][9];
};
We initialize our object by writing a constructor, which gets called upon instantiation of our Maze object. This is done this under the public keyword since our sketch will call the constructor to “create” the object:
class Maze {

  /*=================
   * Global Variables
   ==================*/
  int maze[9][9];

  /*==============
  * Public Methods
  ================*/
  public:

    /* Constructor:
     * creates maze with all unvisited locations by
     * initializing maze[][] with all 0s*/
    Maze() {
      for (int r = 0; r < 9; r++) {
        for (int c = 0; c < 9; c++) {
          maze[r][c] = 0;
        }
      }
      Serial.begin(9600); // set baud rate
    }
};
After, we write our various desired functions for our Maze object with methods. These methods can be called by our main sketch as needed. Method syntax and logic is detailed below:
class Maze {

  /*=================
   * Global Variables
   ==================*/
  int maze[9][9];

  /*==============
  * Public Methods
  ================*/
  public:

    /* Constructor:
     * creates maze with all unvisited locations by
     * initializing maze[][] with all 0s*/
    Maze() {
      for (int r = 0; r < 9; r++) {
        for (int c = 0; c < 9; c++) {
          maze[r][c] = 0;
        }
      }
      Serial.begin(9600); // set baud rate
    }

    /* Marks a given x,y location in the maze as visited
     * Should be called whenever the robot visits a location*/
    void markVisited(int x, int y) {
      maze[x][y] = 1;
    }

    /* Checks if a maze location is visited/unvisited
    * Returns true if location is visited, false otherwise
    * Can be called when searching for an unvisited location*/
    boolean isVisited(int x, int y) {
      if (maze[x][y] == 1)
        return true;
      return false;
    }

    /* Prints this Maze object to serial monitor, displaying
    * current unvisited/visited locations*/
    void printMaze() {
      for (int r = 0; r < 9; r++) {
        for (int c = 0; c < 9; c++) {
          Serial.print(maze[r][c] + "\t");
        }
      }
    }
};
Note that if you want a method to be private (non-accessible to outside the class), simply use private and write it instead under that section.
And that’s it for our Maze object! While this example was relatively simple, you can build upon this by writing even more methods like a depth first search method, Dijkstra’s shortest path method, etc. Now, all of your Maze information to be used in your final robot code is contained in one organized place.
Instantiating Objects in a Main Sketch
After writing our Maze object in our Maze.h file, we want to use it in our main sketch, where we are running our robot’s code.
First, we need to make include the Maze class at the top of our sketch:
#include "Maze.h"

...
We can now create a Maze object (which calls the Maze constructor):
#include "Maze.h"

Maze m = Maze();
// other relevant variables go here
...
And we can use any necessary methods from the Maze class as needed:
#include "Maze.h"

Maze m = Maze();
// other relevant variables go here

void setup() {
  // setup code for robot
  ...
  Serial.begin(9600);
}

void loop() {
  ...

  if (!m.isVisited(x,y)) {  // if x,y unvisited
    // go to x,y location
    ...
    m.markVisited(x,y); // mark x,y as visited
  }

  ...

  m.printMaze(); // for debugging
}
As you can see, our main robot code is now much simpler, neater, and easier to debug!
Tips
- You can create multiple header files (classes) as needed, so long as they you
#includethem in the main sketch, and all of the header files are in the same directory as the sketch is. - Sometimes before writing an actual class for a specific robot task, it may be easier to test the idea in a blank sketch without class declarations.
- Any time changes are made to header files or the sketch, be sure to recompile.